 Personalized attention +34 96 206 62 98
 SHIPPING TO ALL
  9/10 Rating
 Discreet shipping
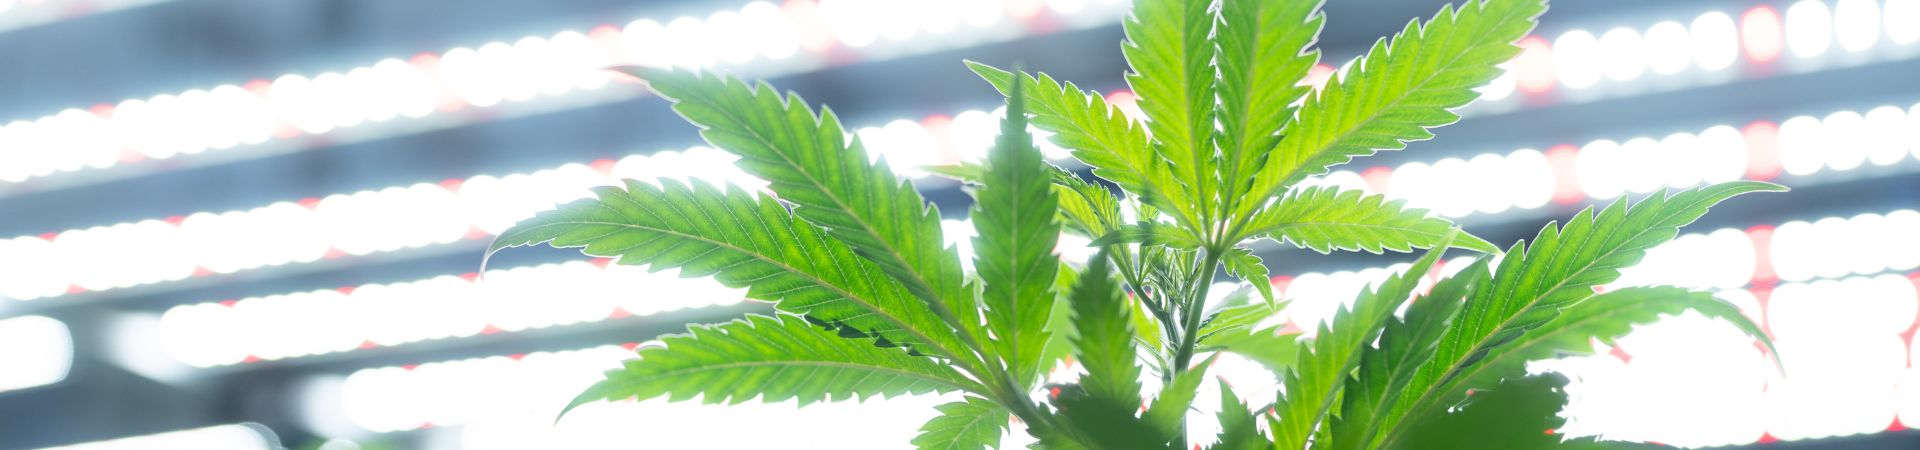
Indoor growing with LED grow lights is quickly becoming the top choice for most cannabis growers. This type of lighting system for marijuana cultivation is based on three main pillars: higher yields, lower heat emission – perfect for summer grows – and energy savings. On our website, you can find three categories of LED grow lights depending on your needs: 300W LED grow lights, 600W LED grow lights, and 800W LED grow lights, offering versatile options to maximize your plant performance. In this article, we’ll explain how to install LED grow lights.
What is LED technology?
LED lights (light-emitting diode) are light-emitting diodes known for their energy efficiency compared to traditional bulbs. They work by projecting light through electroluminescence.
Their colors are determined by the semiconductor material width, while their size is generally small, under 1 mm². They are also considered an eco-friendly option, since they generate a lower amount of CO2 emissions compared to halogen bulbs.

Currently, LED technology is mainly used for growing cannabis seeds, where different types of LED lights are applied:
- Violet light: a mix of blue and red colors, the most basic option.
- COB LED: made up of hundreds of white light diodes that simulate the sun spectrum.
- Spread-style LED: panel with multiple light-emitting diodes of different colors, arranged in a spider-leg style design.
Benefits of indoor growing with LED
Choosing to install LED grow lights indoors offers several advantages compared to growing with other types of lighting systems.
Energy efficiency
LED grow lights use up to 80% less energy than incandescent bulbs. This not only reduces electricity costs but also allows growers to keep lights on longer without worrying about excessive bills.
Light spectrum control
Cannabis plants require different light spectrums during each stage of growth:
- Vegetative stage: plants need cool light (6500K) to stimulate leaf and stem development.
- Flowering stage: they require warm light (2700K) to boost bud production.
To find the best lighting, it is recommended to check the LED vs incandescent equivalence based on the right spectrum. Keep in mind that LED grow panels allow you to adjust the light temperature depending on your plant’s needs – something traditional bulbs cannot do.
Lower heat emission
Incandescent bulbs generate a lot of heat, which can raise the temperature of your grow space and damage the plants. LEDs, on the other hand, emit very little heat since they are cool lights. This reduces the risk of heat stress and lets you hang them closer to your plants without burning them. They are perfect for hot climates or summer seasons, helping you save on cooling systems.

Long lifespan and sustainability
While an incandescent bulb lasts about 1,000 hours, an LED can last between 25,000 and 50,000 hours. This means fewer replacements and long-term savings, lasting up to 11 years of use. Plus, LEDs do not contain mercury or other toxic materials, unlike fluorescent bulbs. This makes them more eco-friendly and safer for the environment.
Other benefits of LED grow lights
- They can double your yield, reaching up to 2 g/w/m², while HPS lights usually reach around 1 g/w/m².
- Closer distance between plants and LEDs due to lower heat output. Recommended distances are 12-16 inches in veg and 8-12 inches in bloom.
- Reduced watering and fertilizer frequency since the substrate won’t dry out as fast.
- Safer for both growers and plants, as LEDs don’t emit harmful UV or infrared rays that can damage cannabis root tissues.
Step-by-step guide to install LED grow lights indoors
Correctly installing your LED grow light system is one of the most important steps to ensure a successful harvest. A proper installation not only guarantees your plants receive the light they need, but also prevents accidents and maximizes the performance of your equipment.
Below, we’ll walk you through everything you need to know, from preparation to final adjustments.
Phase 1: Preparation
Before hanging anything, you need to prepare properly, since good planning can save you time and future issues.
- First, check electrical safety. Make sure your room’s circuit can handle the wattage of your new LED grow light along with the rest of your equipment (exhaust fans, inline fans, etc.). It’s crucial to use a high-quality power strip with surge protection and have a timer ready to set up light/dark cycles.
- Once that’s done, unpack the LED carefully. Check for any damage and make sure all the parts listed in the manual are included. If your model requires assembly, do it on the floor first.
- Finally, prepare your grow space. Installing the light in an empty grow tent is much easier. Identify the anchor points that will support the LED’s weight and ensure they’re strong enough, such as the crossbars in a grow tent ceiling.
Phase 2: Installation
Once everything is set up, it’s time to mount and hang the LED grow light for your indoor cannabis grow. Follow these steps:
- Attach the pulleys or hangers to the LED fixture’s mounting points.
- Lift the fixture and hook it onto the top of your grow tent. Try to center it so the light is distributed evenly across the space.
- Connect the cable from the ballast to the LED panel. Then plug the main power cord into the ballast.
- Use zip ties to keep all the cables organized and secured to the tent bars.
- Once the fixture is safely hanging, turn it on for a few seconds to make sure everything works. Then turn it off to continue adjustments.

Phase 3: Adjust power and height
Hanging the light is only half the job; now it’s time to adjust it to your plants. The golden rule is simple: always start higher. It’s better to keep the light farther away than too close, since overly intense light can stress or even burn young plants irreversibly. Here’s a general guide, but always check the manual for your specific model:
- Germination and clones: Hang the light 28–35 inches above and use low power (25–50%).
- Vegetative stage: Lower it to 20–28 inches and increase power to 50–75% for strong growth.
- Flowering stage: Set it at 12–20 inches and run at 100% to maximize bud production.
How much does the electricity consumption of an LED cost?
If you use a 350W high-efficiency LED for a 1 m² grow, we can calculate the monthly consumption according to the hours of light, using a reference rate of €0.15/kWh. The total electricity cost would be as follows:
| Stage | Hours/day | Daily consumption (kWh) | Monthly consumption (kWh) | Monthly cost (€) |
|---|---|---|---|---|
| Vegetative | 18 h | 6.3 kWh | 189 kWh | €28.35 |
| Flowering | 12 h | 4.2 kWh | 126 kWh | €18.90 |
| Average (1 month of each stage) | – | – | 157.5 kWh | €23.60 |
Disadvantages of LED grow lights
Although indoor grows with LED lights offer many advantages, there are also certain aspects that must be considered before choosing this option:
- LED light colors provide less natural protection against different types of insect pests.
- Indoor grows with LED lighting may require additional heating in colder climates or during the winter season.
- They may also require the use of a dehumidifier when humidity levels are too high.
LED lights for each plant life cycle stage
The development of plants is closely related to the type and amount of light they receive. For this reason, indoor grows with LEDs need different types of light during each stage of their life cycle.
Seedlings and vegetative stage

Seedlings need low-intensity light, or if that’s not possible, the fixture should be kept further away. As the vegetative stage progresses, the intensity should gradually increase, while maintaining the 18/6 photoperiod.
Generative/flowering stage
This is the time to use full power with LED grow lights, where red diodes play a key role in achieving optimal flower formation. Some LED fixtures even have a flowering mode. During these weeks, the photoperiod must be 12 hours of light and 12 hours of uninterrupted darkness.
For autoflowering strains, the light cycle should be kept at 18 or even 24 hours of light.
What to consider when growing indoors with LEDs
There are several aspects that change when switching from sodium bulbs (HPS) to LED lighting. LEDs produce less heat inside the grow tent or room, which means pots take longer to dry out, and both the frequency and amount of watering should be reduced.
That’s why it is often recommended to use coco-based substrates or very airy mediums to avoid excess water around the roots.
On the other hand, although LEDs do not emit UV rays, it’s important to remember that germination of cannabis seeds, whether indoor or outdoor, must take place in complete darkness.
Finally, to optimize indoor LED growing, it is recommended to invest in high-quality panels such as Solux, which are also competitively priced.
How to choose the best LED system for an indoor cannabis grow
Choosing the right LED lighting for a cannabis grow is not as simple as just picking the most powerful lamp. There are several key factors that can make a difference in both yield and bud quality:
- Light spectrum. The LED system must provide a full light spectrum to support both growth and flowering, such as Lumatek fixtures.
- Power. Power should be calculated based on the grow area size. As a reference, between 30 and 50W of LED is recommended for every 30×30 cm.
- Light distribution and coverage. It’s essential to ensure that light reaches all plants evenly to avoid uneven growth. Reflectors or LED panels with diffusion lenses can help improve coverage.
- Heat generation. Although LEDs emit less heat than other technologies, powerful panels may still require heat sinks.
- Adjustability. Some LED systems allow you to adjust the light spectrum for each growth stage. Timers and dimmers can also be installed to optimize the photoperiod and improve energy efficiency.
Common mistakes in indoor LED growing
Choosing the right lighting system is essential to achieving the best results in indoor grows with LEDs. One of the most common mistakes growers make is buying LED lights that do not match the plant’s life cycle needs.
Using the wrong spectrum for the plant’s stage harms its development. That’s why it is recommended to use full-spectrum LEDs, which emit both red tones (flowering stage) and blue tones (growth stage).
Of course, you should never skimp on LED lights, as weaker models cannot deliver the intensity that plants need for healthy development and may even be unsafe for your electrical system.
As mentioned earlier, you must also consider the distance between the light fixture and the plant tops at all times, adjusting both the height and photoperiod according to the stage: 18 hours of light and 6 hours of darkness during vegetative growth, and 12/12 for flowering when using feminized seeds.
GB Lighting: efficient LED lighting systems
Indoor LED growing is often associated with high costs due to the price of LED panels and installation. However, brands like GB Lighting offer exceptional LED systems at competitive prices. You can also get one of our indoor grow tents with complete LED kits, which include everything you need to start your cannabis grow.

This is the case with the 150W Pro LED Panels and the 250W Pro LED Panels, which stand out for being full spectrum thanks to their 3,000K color temperature. They also offer an approximate lifespan of 60,000 hours, Samsung CRI 90 diodes, advanced technology backed by an Inventronics driver, and allow you to adjust light intensity.
Without a doubt, indoor LED growing is revolutionizing the way cannabis is cultivated indoors. Thanks to LEDs, growers achieve larger harvests, lower energy consumption, and greater resource savings.


