Personalized attention +34 96 206 62 98
 Free shipping to Iberian Peninsula from 30€
 9/10 Rating
 Discreet shipping
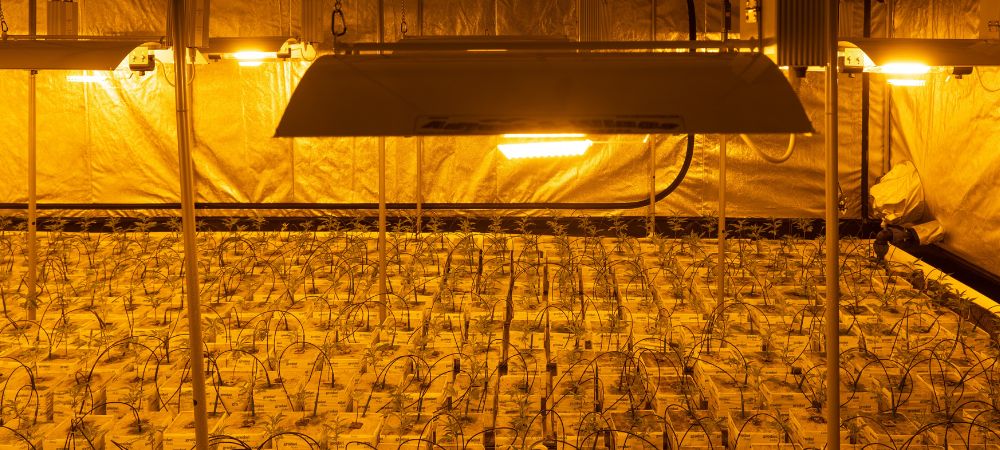
At GB The Green Brand, we will show you how to grow weed step by step at home in an easy way. There are two different environments to grow your cannabis seeds: outdoors and indoors. While outdoors, our plants can photosynthesize thanks to the sunlight; indoors, they develop in grow rooms or tents and need special LED grow lights.
[ppgbo products=”5090,6046,7144″ language=”en”]
Germinate the cannabis seeds
There are different ways to germinate weed seeds, however, we recommend using the paper towel method. Simply place a wet paper towel on the base of a food container and place your seeds on it. Next, cover them with another wet paper and close the container. Make sure to not to flood the seeds, otherwise they would rot. After 24-48 hours, the seeds will start to open and show their root, being ready to be planted in small pots to start developing their root system in the soil.
Weed plants growth
Once our plants have germinated, we must transplant them into 3L plant pots, so they will have enough space to grow their roots in one month. During this time, we need to add some growth fertilizers to our irrigation water, always following the recommended dosages and usage mode, and starting with a small dosage the first days.
[ppgbo products=”7482,4586″ language=”en”]
Indoors, we have to wait around 21-30 days depending on the strain while outdoors, our plants will be growing until summer begins, so we must transplant them once a month approximately into bigger pots.
Transplanting into a flowering pot
When summer begins or when the growing stage is over indoors, we must transplant our weed plants into flowering pots, and switch the photoperiod from 18/6 to 12/12, so they can open their branches to receive more light. These new containers should double the old pots’ capacity, so if we’ve used a 3L pot, we would need a 7L one for flowering.
This way, an outdoors’ plant that has finished its growing stage in a 30L container, should be transplanted at least into a 50L one. Besides, in this stage we need to provide our plants with a good bloom booster along with a growth fertilizer, so they can start flowering early, increasing our future yield.
[ppgbo product=”1173″ language=”en”]
Pre-flowering stage
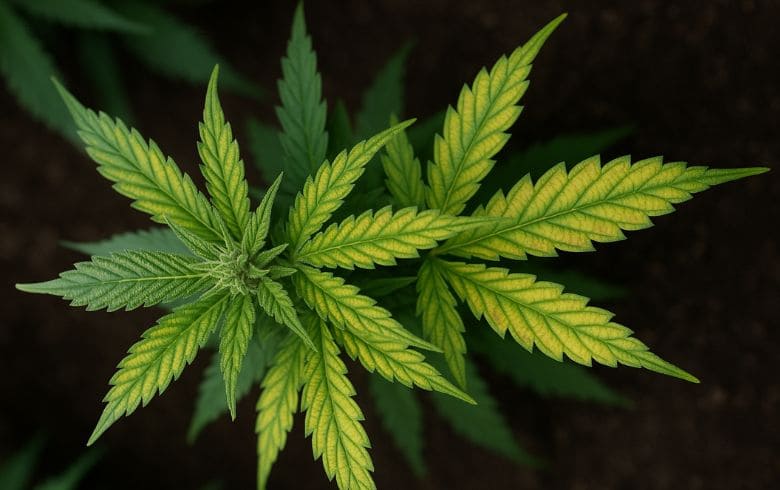
If you’re growing regular seeds, this is the moment to identify the plants’ gender to prevent males from ruining our crops. You should check the base of their branches: if you see a chalice-like structure with two ‘small hairs’, it means that your plant is female (and is starting flowering); on the other hand, if you see some kind of tiny balls… congrats, it’s a boy!
Remember to put your male plants away if you don’t want to end up with a bunch of seeds in your precious flowers. On the other hand, you’ll have to switch your growth fertilizer to a flowering one to be used along the bloom booster.
Flowering stage
Once our buds start growing white fuzz, producing long colas in the branches and tips, we’ll know that the plants have started the flowering stage. Thus, you’ll need to use a bloom booster with a flowering fertilizer until the flowers have completely developed, and use only the flowering fertilizer with a sugars’ supply to get more dense, compact and resinous buds.
Buds fattening
Plants will start fattening their buds approximately 40 days after switching their photoperiod indoors to 12/12, showing awesome and huge flowers. As they need lots of energy to increase their sizes, we’ll need to provide high doses of phosphorus and potassium using a PK fattening fertilizer along with your flowering fertilizer until your plants stop producing the previously mentioned chalices. When that time comes, perform a root wash and wait 15 days to be harvested (please note that despite what the seed bank instructions say about the flowering time, it’s advisable to wait two more weeks).
[ppgbo product=”2757″ language=”en”]
Root washing
Performing a root wash is extremely important to harvest our plants without fertilizer residues that may have an impact on the flavor and quality. If the plants still absorb large amounts of water, we can wash them in the shower until the water comes out clean. On the other hand, if they can’t absorb more water, we should keep watering with only water every time they get dry for at least 10 days, otherwise if we wash them, the roots may rot.

Harvest and drying
Once the soil has dried after the root wash, we must harvest our weed plants to trim them with a bud trimming machine or some pruning shears and finally dry them.
[ppgbo products=”6441,871″ language=”en”]
If you are drying your plant in a cold area that gets humid at night (and that takes more than 15 days to dry), we must cut all the leaves before starting this process. On the other hand, if you live in a warm or dry area (in which your plant takes less than 15 days to dry), you don’t have to trim your plant, as it could affect the final flavors and aromas.
In any case, look for a good place to dry your plants, hang them upside down with rope, and avoid airflows and excessive light and heat exposure. This way, you’ll get a product of the finest quality.