Personalized attention +34 96 206 62 98
 Free shipping to Iberian Peninsula from 30€
 9/10 Rating
 Discreet shipping
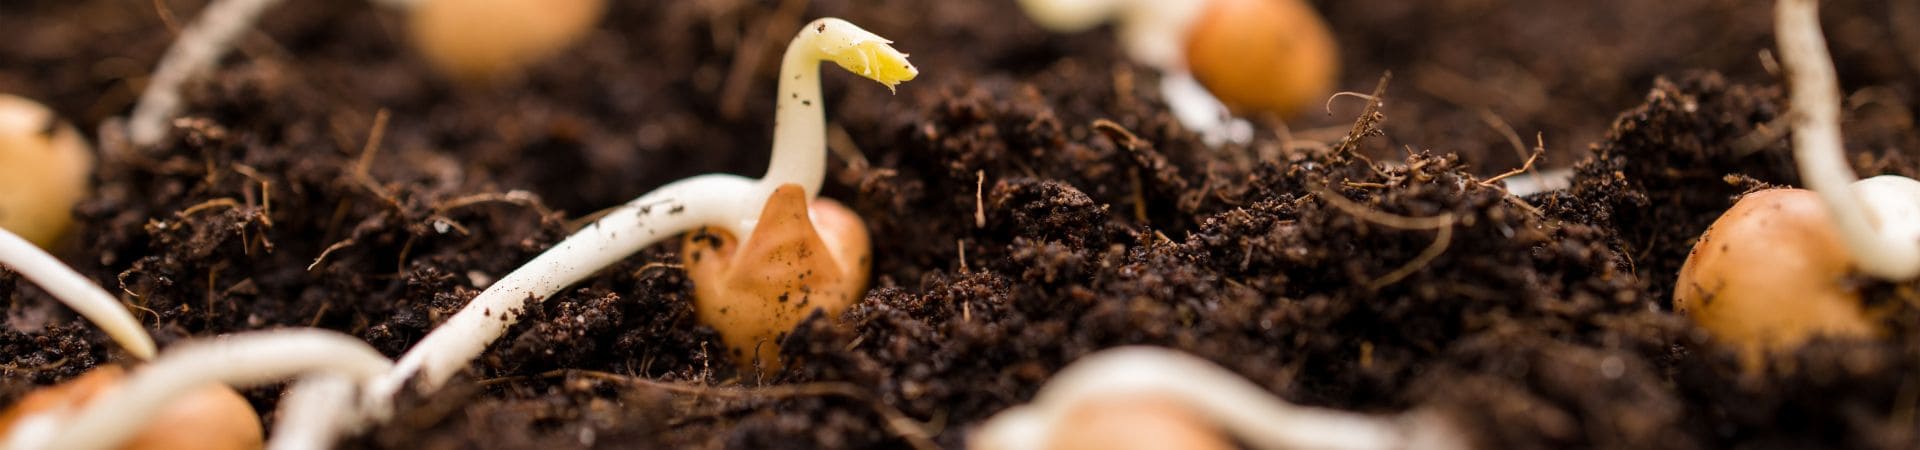
Once you’ve successfully germinated your cannabis seeds, you’re entering a crucial phase in your plant’s development. The germination process marks the beginning of the plant’s life cycle, but it’s the subsequent stages that truly define its potential. Proper care during the early days can prevent issues like damping-off (seedling death), transplant shock, or stunted growth. If you’re wondering what to do after germinating marijuana seeds, this guide will walk you through preparing the environment, transplanting seedlings, and providing the necessary care to ensure healthy development.
When to transplant a germinated seedling?
Timing your transplant is critical for the future health of your plant. Transplanting too early can stress the fragile root system, while waiting too long may damage the roots during handling. Identifying the optimal time is essential.
How to determine the right time
- Root length: The primary root (radicle) should be visible and approximately 1–2 cm long.
- Root health: The root should be white and firm. If it’s dark or mushy, the seed may be compromised.
What to do if germination is too fast or slow?
Typically, cannabis seeds germinate within 24 hours to 5 days under optimal conditions. However, sometimes the process may accelerate or slow down. Here’s how to handle both scenarios:
Accelerated germination
- Observation: If the seed develops a root longer than 3 cm within 48 hours, it may be due to extreme heat or humidity.
- Action: Transplant immediately to prevent the root from tangling or drying out. Handle with care to avoid breaking the root.
Delayed germination
- Observation: If there’s no root after 5 days, check environmental conditions. Low temperatures (<20°C) or excessive dryness can delay germination.
- Action: Place seeds in a warmer location (22–26°C) with consistent humidity. Alternatively, soak seeds in a 1 ml/L hydrogen peroxide (3%) solution for 12 hours to soften the seed coat. If germination doesn’t occur, the seed may be unviable.
What to do after germinating marijuana seeds: preparing the substrate
The substrate serves as the initial home for your cannabis seedlings, influencing their early development. Choosing the right medium is vital to avoid nutrient imbalances or root suffocation.
Ideal substrate characteristics
Seedlings require a light, aerated, low-nutrient substrate because their young roots are fragile and sensitive. A medium that is too dense or loaded with fertilizers can suffocate or burn them, since at this stage they feed mainly on seed reserves (cotyledons). After germinating marijuana seeds, avoid transplanting them directly into substrates for adult plants.
On the other hand, adult plants need a substrate richer in nutrients and with greater water retention capacity to support their vigorous growth, flowering and increased mineral demand. In addition, their developed roots are more tolerant of more compact and complex mixes, such as those that include compost or organic fertilizers.
Therefore for newly germinated marijuana seedlings we will need a medium that meets three fundamental requirements:
- Lightness and aeration. Young roots require oxygen to develop. A substrate that is too compact (such as garden soil) limits this gas exchange, slowing growth. In this sense the ideal is to provide a substrate that combines perlite (30% of the mixture), vermiculite and coconut fiber, three materials that promote drainage and retain moisture without puddling.
- Low nutrient content. Seeds contain sufficient reserves (in the cotyledons) for the first 7-10 days. A highly fertilized substrate can burn the tender roots. Our recommendation is to use “Light Mix” mixtures, which are specific for seedlings. In addition, fresh organic fertilizers (such as manure) or chemical fertilizers should be avoided at this stage.
- Balanced pH (6.0-6.5). An out-of-range pH blocks nutrient uptake, even if the substrate is adequate. How to adjust the pH? If it is high (>7.0) blond peat or diluted citric acid should be added. If it is low (<5.5) dolomite or calcium water can be added.
Alternative growing mediums
For those seeking innovative or efficient methods, several alternatives to traditional soil substrates are available:
- Jiffys or compressed peat pellets. Jiffys are one of the most popular alternatives for germination and the early stages of cultivation. These compact discs, made primarily of peat and coconut fiber, expand when hydrated, creating an ideal medium for root development. They are easy to use, biodegradable, and retain just the right amount of moisture.
- Rockwool. Rockwool is an inert medium made from melted volcanic rock. It is widely used in hydroponic systems and by growers who seek precise control over their plants’ nutrition. Its fibrous structure allows excellent airflow to the roots, making it perfect for germination and seedling stages.
- Coconut coir. Coconut coir is a sustainable, organic substrate derived from the coconut husk. It’s an excellent alternative for those seeking a lightweight and eco-friendly medium. It has great water retention and aeration capacity, mixes well with other media, and helps prevent compaction.
- Starter Cubes (Root Riots): These small cubes are made from compressed organic materials, such as peat and beneficial enzymes, specifically designed for rooting. Some include rooting hormones to stimulate root development. They can also be transplanted along with the cube itself, reducing transplant shock for the plant.
- Water (Direct Hydroponic Method) Some growers prefer to start seeds directly in oxygenated water, a method used in systems like DWC (Deep Water Culture). This method requires some knowledge, proper equipment, and constant monitoring.
By understanding and implementing these steps, you can ensure that your cannabis seedlings transition smoothly from germination to healthy growth. Proper care during this critical phase sets the foundation for a successful cultivation journey.
| Material | Composition | Ideal pH | Water Retention | Aeration | Nutrients | Difficulty | Recommended for | Lifespan |
|---|---|---|---|---|---|---|---|---|
| Light Mix (Commercial) | Peat moss + perlite (20–30%) | 6.0–6.5 | Moderate–High | High | Low | Beginner | Germination and early weeks | 3–4 weeks |
| Jiffys (peat) | Compressed peat + mesh | 5.8–6.2 | High | Medium | None | Beginner | Initial germination | Until transplant |
| Rockwool | Inert mineral fibers | 5.5–5.8 | Medium | Very High | None | Advanced | Hydroponics / clones | Multiple cycles |
| Coconut Coir | Coconut fiber + perlite | 6.0–6.8 | High | High | Low | Intermediate | Semi-hydroponic systems | 2–3 cycles |
| Root Riot / Cloners | Peat + enriched enzymes | 5.8–6.3 | Medium–High | Medium–High | Slight | Intermediate | Cuttings and germination | Single use |
| 100% Perlite | Pure perlite | 6.0–7.0 | Low | Very High | None | Advanced | Rapid rooting | Unlimited |
| 100% Vermiculite | Pure vermiculite | 6.5–7.0 | Very High | Medium | None | Intermediate | Extreme moisture retention | Unlimited |
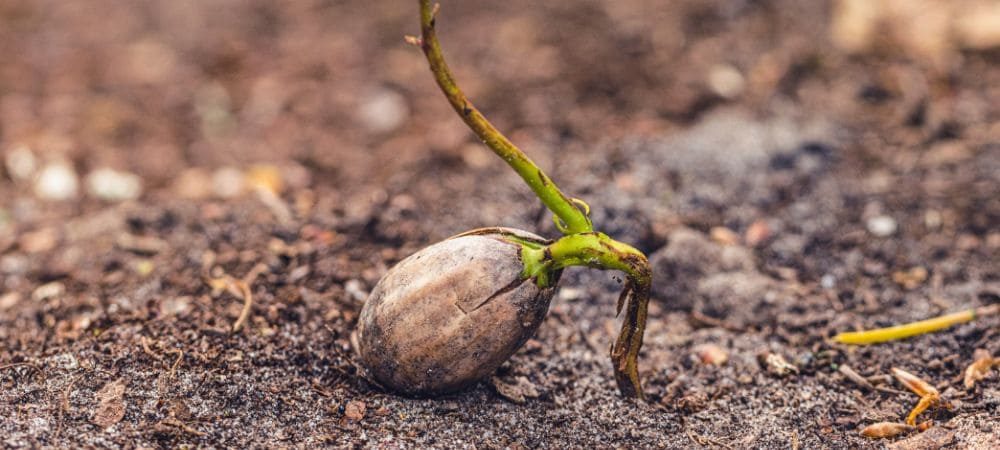
How to plant a germinated seed step-by-step
Transplanting a germinated cannabis seed is a critical step in the cultivation process. Improper handling at this stage can damage the delicate root (radicle) or cause transplant shock, which may affect future growth. If you’re wondering what to do after germinating seeds, follow these detailed instructions to plant them correctly and safely.
How to handle a germinated seed
Before you touch the seed, it’s essential to prepare a clean, stable environment. The newly emerged root is extremely sensitive to temperature changes, contaminants, and even light pressure.
- Tool preparation: Use fine-tip tweezers disinfected with isopropyl alcohol or hydrogen peroxide. If you prefer using your hands, wash them thoroughly and consider wearing clean nitrile gloves.
- Handling technique: Always grasp the seed by its shell, avoiding any direct contact with the root. If the root is stuck to the germination paper, moisten the area with lukewarm water to loosen it gently without pulling.
Ideal timing: Perform this step in dim lighting and a warm environment (72–77°F or 22–25°C) to minimize stress on the seedling.
How to place the germinated seed in the soil
The seed’s depth and orientation significantly affect its ability to emerge and grow properly.
- Creating the Planting Hole: Use a pencil or clean finger to make a hole 0.2 to 0.4 inches (0.5–1 cm) deep in the center of your container. Use the shallower end for light substrates like coco or perlite mixes; use the deeper end for denser peat-based soils.
- Correct Orientation: Place the seed with the root pointing downward and lying horizontally. This helps the stem (hypocotyl) rise naturally while the root grows downward.
- Cover Lightly: Gently cover the seed with a thin layer of substrate. Do not compress it. Compacting the soil can hinder the seedling’s emergence.
First watering and initial conditions
The first watering marks the seedling’s transition from relying on the seed’s stored nutrients to active growth.
- Watering technique: Use a fine-mist spray bottle with room-temperature water (68–72°F / 20–22°C) adjusted to a pH of 6.0–6.5. Water until the substrate feels like a wrung-out sponge—moist but not dripping.
- Humidity control: Cover the container with a humidity dome or perforated plastic wrap to maintain 70–80% relative humidity. Remove the cover for 10 minutes daily to refresh the air and prevent mold.
- Lighting setup: Place the seedling under soft light (100–200 PPFD). With LEDs, keep a distance of 20–28 inches (50–70 cm); with fluorescent T5s, 6–8 inches (15–20 cm) is ideal. Avoid direct sunlight at this stage.
- Daily monitoring: For the first 3–5 days, observe stem firmness and cotyledon color. A slight lean toward the light is normal. If the stem stretches too much (etiolation), move the light source slightly closer.
By following these careful steps, you’ll ensure that your germinated seed transitions smoothly into a healthy seedling. Knowing what to do after germinating seeds can make the difference between a weak start and a strong, thriving cannabis plant.
Initial care after transplanting
The period immediately following transplanting is crucial for the seedling to settle in and begin healthy growth. During these first few days, the plant is especially vulnerable and requires controlled environmental conditions to develop a strong root system and vigorous growth. What to do after germinating marijuana seeds at this stage includes monitoring key factors such as light, temperature, and humidity.
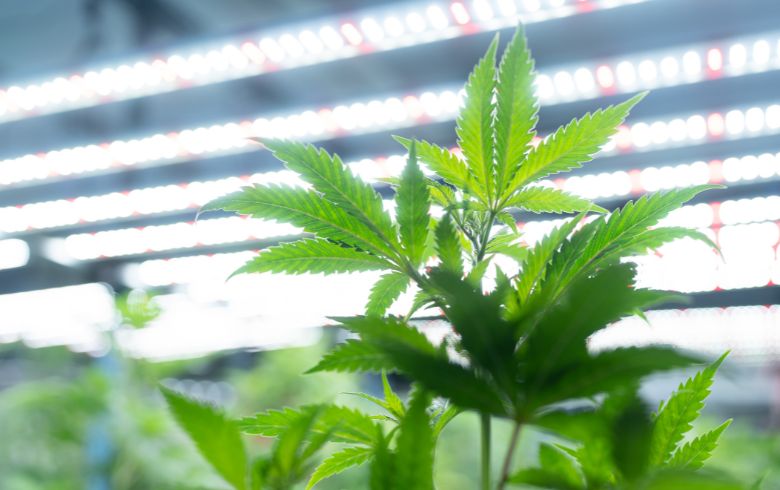
Light for newly transplanted seedlings
Proper lighting is essential to avoid light stress while promoting early photosynthesis. Newly transplanted cannabis seedlings need moderate light intensity (100–200 PPFD or 5,000–10,000 lux). Too much light can burn the cotyledon leaves, while too little will cause etiolation (weak, stretched growth).
- Recommended light type: If using LED lighting, choose full-spectrum LEDs (warm white or violet/blue mix) positioned 20–28 inches (50–70 cm) above the plants. T5 fluorescent lights (cool white) are also a good option, typically placed 6–8 inches (15–20 cm) above the seedlings. These are ideal for this stage because they emit very little heat.
- Light cycle: Maintain an 18-hour light / 6-hour dark cycle to stimulate vegetative growth without stressing the plant.
- Adjustments: If the leaves start curling upward, it’s usually a sign of light stress—raise the light fixture to reduce intensity. On the other hand, if the stem stretches excessively, the plant is likely reaching for more light—lower the light slightly or increase intensity.
Temperature and humidity
Precise climate control can make the difference between a thriving seedling and one that suffers stress early on. During this critical stage, newly formed roots are extremely sensitive to environmental changes and require conditions that mimic the protective microclimate of a natural greenhouse. If you’re wondering what to do after germinating marijuana seeds, follow these guidelines:
- Ideal temperature for marijuana seedlings: The optimal daytime temperature is between 72–77°F (22–25°C), which supports ideal root cell metabolic activity. At night, a drop to 64–68°F (18–20°C) is acceptable, but temperature swings greater than 5°C (9°F) between day and night can slow down growth. In colder climates, heating mats under the pots can be invaluable, keeping the root zone at 68–72°F (20–22°C) even if ambient temperatures drop.
- Humidity: Initially, seedlings require 70–80% relative humidity, which reduces leaf transpiration while roots establish. This level is best maintained with propagation domes, which should be opened briefly each day to refresh the air and prevent excessive condensation. By the second week, humidity should gradually be lowered to 60–65%, which strengthens the leaf cuticle and prepares the plant for less controlled environments.
Watering and oxygenation: The delicate balance
Wondering what to do after germinating marijuana seeds? Water management during this stage is arguably the most critical—and most commonly mishandled—aspect of early care. Seedlings need consistent moisture but should never be overwatered, as their roots actively breathe and will suffocate quickly in anaerobic (oxygen-poor) conditions.
- First watering: The first watering after transplanting should thoroughly moisten the growing medium without saturating it. Use about 20–30 ml of water per half-liter of pot capacity. Always use room temperature water (68–72°F / 20–22°C) with a pH of 6.0–6.5. A fine-nozzle spray bottle is ideal to avoid disturbing the substrate or damaging delicate structures.
- Watering frequency: Frequency should be based on tactile observation: the top layer of substrate should feel just slightly dry before the next watering. This typically occurs every 2–3 days, depending on environmental conditions. It’s crucial to allow oxygen to flow freely between substrate particles. Additives like perlite (at least 30% of the mix) and pots with large drainage holes help ensure proper aeration.
- Monitoring oxygenation: A key sign of proper oxygenation is root color: roots should remain white and vigorous. If you notice brown hues or stalled growth, it’s a sign of root suffocation. This calls for immediate action—improve aeration in the substrate and consider transplanting into a lighter medium.
Stress and disease prevention
Seedlings are highly sensitive to pathogens and adverse environmental conditions. Knowing what to do after germinating marijuana seeds includes taking preventive steps to avoid future issues in your grow.
Gentle ventilation: Use an oscillating fan on the lowest setting, positioned away from the plants. The goal is to circulate air gently, not to create direct wind, which can damage delicate seedlings.
Fungal protection: Apply Trichoderma to the growing medium to strengthen root development and prevent harmful fungi such as Pythium (root rot). It’s also best to avoid foliar spraying at night, as nighttime moisture increases the risk of mold.
Warning signs:
- A weak, wilted stem is often a sign of overwatering or poor root oxygenation.
- If leaves begin to turn yellow, this may point to nutrient lockout caused by incorrect pH levels.
Below is a reference table with all the key recommendations on what to do after germinating marijuana seeds.
| Ideal Conditions | Tools/Techniques | Warning Signs | |
|---|---|---|---|
| Temperature | Day: 72–77°F (max 82°F) Night: 64–68°F (Δ<9°F) Root zone: 68–72°F | Heat mat (for cold climates) Ambient thermometer | Slow growth (low temps) Curled leaves (heat or cold stress) |
| Humidity | Week 1: 70–80% RH Week 2: 60–65% RH | Humidity dome (ventilate 10 min/day) Hygrometer Spray bottle (pH 6.0) | Mold on leaves/soil (excess humidity) Weak stem (too much moisture and low oxygen) |
| Watering | First watering: 20–30 ml per 0.5L pot Frequency: Every 2–3 days (when topsoil feels dry) | Misting bottle or fine-spout watering can Warm water (68–72°F, pH 6.0–6.5) | Drooping stem (overwatering and oxygen deprivation) Yellow leaves (pH imbalance or poor root aeration) |
| Oxygenation | Soil with 30% perlite/vermiculite Proper drainage (wide holes) | Pots with drainage holes Avoid standing water trays | Brown roots (suffocation from excess water) Soil compaction (holds too much moisture, restricts air) |
| Ventilation | Gentle airflow to strengthen stems Avoid direct strong wind | Oscillating fan (low speed) Windows or exhaust fan for air exchange | Fungal infections (e.g., Pythium) from stagnant air and high humidity Leggy or weak stems (etiolation from poor airflow and low light) |
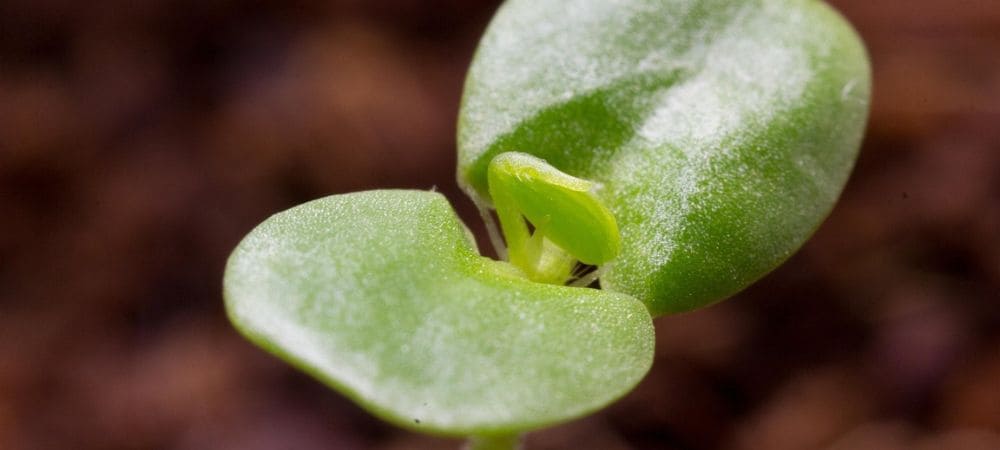
When does the vegetative growth stage begin?
The vegetative growth stage is when the cannabis plant begins to develop its main structure: stems, branches, and leaves. This phase marks the transition from a fragile seedling to a robust plant ready to flower and yield a great harvest. Identifying the exact moment when this stage starts is crucial to adjust care and stimulate growth potential.
Once the seedling stage is over
The transition to the vegetative stage doesn’t happen overnight but is reflected through progressive changes in the plant’s structure. Here are the signs to watch for:
- Development of true leaves. After the cotyledons (rounded seed leaves), the first serrated leaflets appear (usually 3 to 5 per leaf). When the plant has at least 2–3 pairs of these true leaves, it no longer relies solely on the seed’s reserves.
- Accelerated vertical growth. The main stem visibly elongates, up to 1–2 cm per day under ideal conditions. First nodes also appear—these are the points where side branches begin to grow.
- Root expansion. If the plant is in a transparent pot or during transplant, you’ll see white, fibrous roots occupying at least 60% of the growing medium.
- Typical duration. The complete transition usually occurs between 7 and 14 days after germination, depending on genetics (Indicas tend to be faster than Sativas).
Start of fertilization
The beginning of the vegetative growth stage requires a change in nutrition. While seedlings rely on their internal reserves, they now need external nutrients to support development.
Nitrogen (N) is essential for leaf and stem growth (e.g., use NPK 3-1-2 fertilizers). Micronutrients like iron (Fe) and calcium (Ca) prevent yellowing and strengthen cell walls.
The general recommendation is to start with ¼ of the manufacturer’s suggested dose. Apply it every other watering during the first weeks, gradually increasing.

Common mistakes after germination (how to fix them)
The period following germination is particularly delicate, and small mistakes can compromise seedling development. Knowing what to do after germinating cannabis seeds is essential to avoid errors that could ruin your grow. Here are the most frequent mistakes growers make, along with practical solutions to avoid or correct them:
Overwatering: The silent killer
The most common and devastating mistake is drowning seedlings with too much water. Young roots need both moisture and oxygen, and waterlogged soil causes root suffocation and encourages fungi like Pythium.
Solution: Water only when the substrate feels slightly dry to the touch (1–2 cm deep). Use a spray bottle in the first few days and pots with proper drainage. The substrate should feel moist, not soaked.
Improper substrates: too dense or too fertilized
Many beginners use soil meant for mature plants, which is often too compact and nutrient-rich, burning the tender roots or hindering development.
Solution: Use airy mixes with 30% perlite/vermiculite and low nutrient content. Seed-starting substrates are ideal. If using standard soil, mix it with perlite in a 1:1 ratio.
Improper Lighting: too much or too little
Placing seedlings under powerful lights (like high-wattage LEDs too close) causes light stress, while lack of light results in stretching (long, weak stems).
Solution: During the first 5–7 days, use soft light (100–200 PPFD). T5 fluorescents or LEDs placed 50–70 cm away are ideal. Adjust the height according to plant response: if they stretch, move the light closer; if they wilt, raise it.
Traumatic transplant
Rough handling of roots when moving seedlings to final pots can cause irreversible damage. Transplanting too early or too late is also risky.
Solution: Wait until the seedling has 2–3 pairs of true leaves. Use biodegradable pots to avoid direct root handling. Water the substrate before transplanting to reduce stress.
Extreme environmental conditions
Seedlings are sensitive to low temperatures (<18°C), direct air currents, or very low humidity (<50%), all of which can slow growth or kill them.
Solution: Maintain 72–77°F (22–25°C) and 70% relative humidity in the first days. Use propagation domes or mini-greenhouses to stabilize the microclimate and vent them daily.
Premature fertilization
Applying nutrients too early (before day 10–14) burns the roots, as seedlings are still feeding off their cotyledons.
Solution: Don’t fertilize until 2–3 pairs of true leaves appear. During the seedling stage, plants need light feeding. Start with a gentle nitrogen-rich nutrient solution to support healthy root development. Then gradually increase concentration. Use cannabis-specific fertilizers and follow dosage recommendations to avoid overfeeding.
Lack of pathogen prevention
Damping-off (sudden seedling death from fungi) is common when basic preventive measures are ignored.
Solution: Sterilize the substrate (bake at 100°C for 30 minutes) and use water with 10% hydrogen peroxide in the first waterings. Avoid excess moisture and ensure soft ventilation.

Recommended products after germination
Once your seeds have germinated, some products can greatly simplify seedling care and enhance development. This selection is designed to meet the specific needs of early growth stages.
Light Mix substrates
The initial growing medium should offer support and aeration without overwhelming young roots with nutrients.
- Light Mix by GB Nutrients. A blend of peat, coco, and perlite with excellent moisture retention and aeration—ideal for optimal results.
- BioBizz Light Mix. A perfect mix of peat, perlite, and coconut fiber with adjusted pH (6.2–6.5). Great for the first 2–3 weeks.
- Plagron Light Mix. This substrate includes natural amendments that help prevent nutrient deficiencies.


Containers
- Biodegradable pots (peat-based). Ideal for stress-free transplants.
- Jiffy 7mm. These compact discs expand with water—perfect for germination and early days.
Mini-greenhouses
Propagator Kit + Tray. Includes a clear lid and adjustable vents. Maintains 70–80% humidity. Perfect for both seeds and clones.
Low-consumption LED Grow Lights
- Panel LED Pro 250W by GB Lighting. Its full light spectrum is perfect for both growth and flowering stages. Includes a controller to adjust intensity by plant stage.
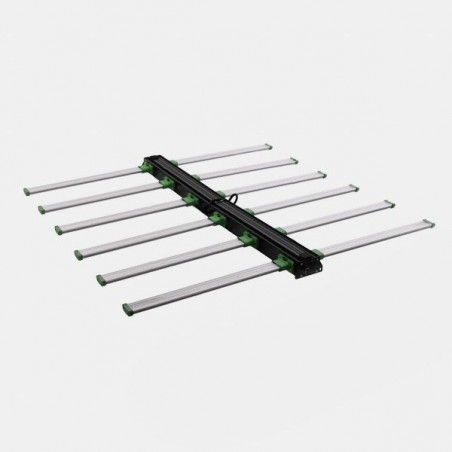
- Dragonfly 640W LED System. With a full-spectrum output, this is an ideal choice for all stages of plant life, maximizing yield and quality.
First fertilizers
- Canna Start. A vital nutrient cocktail for early plant stages. Specially formulated fertilizer for seedlings and cuttings.
- Roots by GB Nutrients. A powerful bio-mineral root stimulator that promotes root development and nutrient uptake for a stronger, healthier start.
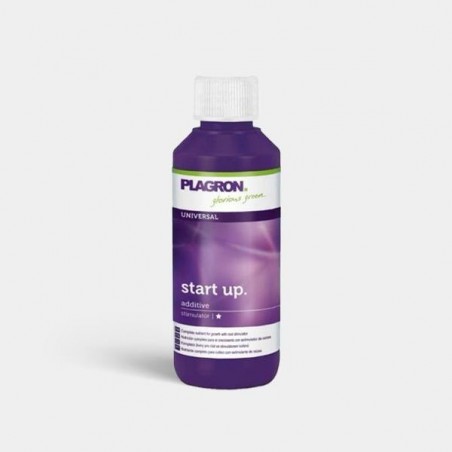
- Start Up. A complete seedling fertilizer enriched with a root booster, applied during the first days of cannabis cultivation.


Knowing what to do after germinating cannabis seeds is key to ensuring a successful grow. From preparing the right environment to transplanting and giving proper care, each step is essential for healthy plant development. With attention, patience, and the right adjustments, you can enjoy a high-quality, abundant harvest.
Remember that cannabis cultivation is a continuous learning process. Stay tuned for our upcoming blog posts for more tips, techniques, and guides to help you become a skilled grower!
FAQs: What to do after germinating marijuana
How to water without drowning delicate roots?
Should cotyledon leaves be touched?
Can seedlings “sense” stress from other plants?
Can seedlings experience “jet lag”?
Why are my seedlings stretching like spaghetti?
- Move your LED lights closer — to 6–8 inches (15–20 cm), being careful not to burn them.
- Use a gentle fan to strengthen the stem, since air movement mimics natural wind.