Personalized attention +34 96 206 62 98
 SHIPPING TO ALL
  9/10 Rating
 Discreet shipping
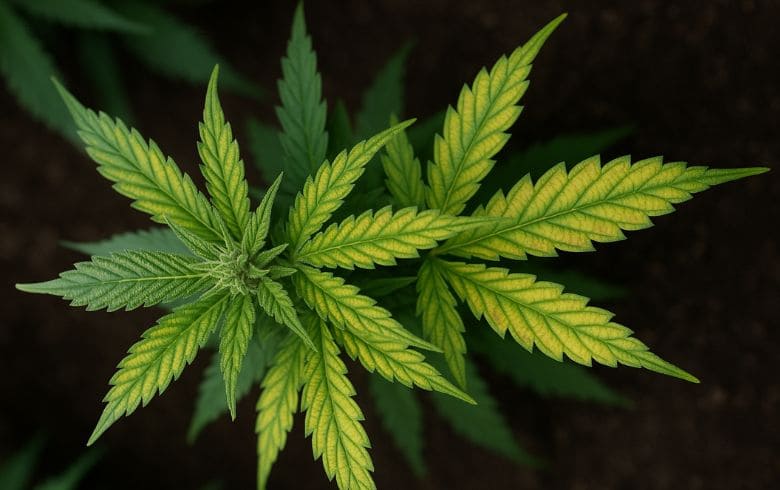
When starting to grow cannabis plants, cometimes growers get a bit lost wondering when to use fertilizers and usually have doubts related to doses. That’s why, if you’re seeking information on cultivating marijuana in the most professional and efficient manner possible, find below the renowned Atami feeding charts. Indeed, this brand offers various modes and formats to meet all cultivators’ needs. Within them, methods, additives, and substrates can be distinguished, aiming to achieve the most productive results from our harvest.
Originally from the Netherlands, Atami has become one of the most esteemed fertilizer companies by experienced growers due to the proven quality of its products. It is also known for its commitment to enhancing and innovating in the research and study of its products. Founded in 1997, Atami has categorized its products into three ranges: ATA, B’Cuzz, and ATA Ngr.
Atami Feeding Charts
Atami fertilizers stand out for their quality, competitive prices, and ease of use. Moreover, with them, you will ensure your marijuana plants grow in the best possible way, enhancing their color, flavor, scent, and effects.
Marijuana grows differently depending on its life cycles, for which various specific nutrients need to be supplied. Its main phases are growth and flowering. In the first phase, they require high levels of nitrogen, while in the second, they need to be provided with other nutrients such as phosphorus and potassium. Further, these components are necessary for proper photosynthetic development and resin production. Therefore, the quantity, form, and content of the nutrients to be supplied must be clear and concise.
Atami feeding charts: Key products
Firstly, let’s explain the main products that compose the multiple Atami charts, aiming to elucidate their content, function, and usage:
- Bloombastic: a fertilizer for the final phase that provides carbohydrates, sugars, a high PK value to achieve increased flowering, THC levels, and resin.
- Rootbastic: root stimulator, rich in biominerals and biostimulants, providing an excellent NPK combination. Besides, it can be used in different growing mediums such as soil, coco coir, rock wool, quantum, and mapito.
- Soil Nutrition A+B: a fertilizer that provides the necessary nutrient quantities to maintain the most efficient mineral nutrition of our crop. It can be used in any drip irrigation system.
- Blossom Builder Liquid: a finisher for the last 4 weeks of flowering, providing phosphorus and potassium, resulting in abundant flowering and giving hardness and density to the buds.
- Coco Max A&B: a base fertilizer used in growth and flowering phases, applicable in any watering system, that promotes balanced crop nutrition.
- Hydro A&B: nutrient solution for hydroponic cultivation, usable during the plants’ vegetative cycle. Its use is recommended in rock wool and mapito.
- 1 Component Soil Nutrition: a fertilizer for all plant life stages, with a biomineral composition offering fruitful harvests without using any chemical elements.
How to understand the Atami feeding charts
The Atami feeding chart spans a total of 10 weeks of cultivation, specifying the necessary light hours during each week. Similarly, each week explains the required quantity of each product, as well as the recommended pH and EC levels.
- The doses listed in the charts are purely indicative, so the specified maximum amounts should be applied when the plants are in an optimal and strong state.
- It is recommended to maintain pH levels between 6.0 and 6.5, as well as EC values around 1.2 and 2.2.
- If you know the pH and EC levels, our advice is to apply half of the specified dose listed in the chart.
- For the Atami AWA chart, regarding the Awa Leaves and Awa Max fertilizers, first add part A and stir the water, then do the same with part B. Afterwards, apply and mix the remaining additives, as well as measure and adjust the pH again.
- If you observe signs of overfertilization in the plants, perform a root flush and restart the process with a lower dose than before.
Next, we detail the different Atami feeding charts, providing the basic notions to start producing, enhancing, and improving your own harvests:
TERRA Rootbastic & Bloombastic

- Rootbastic: 1st week: 0,1 ml/L; 2nd week: 0,2 ml/L; 3rd week: 0,3 ml/L
- Atazyme: From week 3 to week 9: 1-3 ml/L
- Terra Leaves: 1srt and 2nd week: 1,5 to 3 ml/L.
- Terra Max: 3rd and 4th week: 3 -4 ml/L and from the 5th to 9th week: 4-5 ml/L.
- Bloombastic: 0,5 to 1 ml/L from week 6 to 9.
- B’Cuzz Silic Boost: From week 1 to 9: 0,1 ml/L.
B’Cuzz Soil A&B Bloombastic

- Soil Nutrition:
As weeks 1 and 2 progress: between 1 and 1.5 ml/L of A and B
In weeks 3 and 4: between 1 and 2 ml/L of A and B
In weeks 5, 6 and 7: between 3 and 4.5 ml/L of A and B
During weeks 8 and 9: between 4 and 5 ml of A and B - Silic Boost : 1st-9th weeks: 0.05 to 0.1 ml/L.
- Root Stimulator: 1st and 2nd weeks: 0.5 to 1 ml/L
- Soil Booster: 3rd-5th weeks: 0.1 to 0.5 ml/L.
- Bloom Stimulator: 4th-9th weeks: 0.5 to 1 ml/L
- Bloombastic: 6th-9th weeks: 0.5 to 1 ml/L.
- Atazyme: From week 3 to 9: 1-3 ml/L
B’CuzZ Soil A&B + Blossom Builder Liquid

- Soil Nutrition:
During weeks 1 and 2: A and B between 1 and 1.5 ml/L.
In weeks 3 and 4: A and B between 1 and 2 ml/L.
As weeks 5, 6 and 7 arrive: A and B between 3 and 4.5 ml/L.
In weeks 8 and 9: A and B between 4 and 5 ml/L. - Root Stimulator: 1st and 2nd weeks: 0.5 to 1 ml/L.
- Soil Booster: 3rd-5th weeks: 0.1 to 0.5 ml/L.
- Bloom Stimulator: 4th-9th weeks: 0.5 to 1 ml/L.
- Blossom Builder Liquid: 6th-9th weeks: 0.25 to 0.5 ml/L.
- Silic Boost: 1st-9th weeks: 0.05 to 0.1 ml/L.
- Atazyme: From week 3 to 9: 1-3 ml/L
B’cuzZ 1-Component + Bloombastic

- 1-Component:
- During weeks 1 and 2: 1 to 3 ml/L.
- During weeks 3 and 4: 2 to 4 ml/L.
- When weeks 5, 6 and 7 arrive: 3 to 4.5 ml/L.
- In weeks 8 and 9: 4 to 5 ml/L.
- Root Stimulator: 1st-2nd weeks: 0.5 to 1 ml/L.
- Soil Booster: 3rd-5th weeks: 0.1 to 0.5 ml/L.
- Bloom Stimulator: 4th-9th weeks: 0.5 to 1 ml/L.
- Bloombastic: 6th-9th week: 0,5 to 1 ml/L.
- Silic Boost: 1st-9th weeks: 0.1 ml/L.
- Atazyme: 3rd-9th weeks: 1 to 3 ml/L.
Organic Feeding Chart

- Root-C: 1st-2nd weeks: 1 to 5 ml/L
- Flower-C: 3rd-9th weeks: 1 to 5 ml/L
- Growth-C: 1st-2nd weeks: 0.5 to 1 ml/L 3 to 9 weeks: 3 to 5 ml/L
- Bloom-C: 3rd-9th weeks: 1 to 3 ml/L
- Flavor: 8th and 9th week: 0.5 to 1 ml/L
- Alga-C:
- 3rd and 4th week: 1 to 2 ml/L
- 5th and 6th week: 2 to 3 ml/L
- 7th, 8th and 9th week: 3 to 4 ml/L
Coco Max A&B Rootbastic + Bloombastic

- Rootbastic:
- 1st week: 0.1 ml/L
- 2nd week: 0.2 ml/L
- 3rd week: 0.3 ml/L
- Atazyme: 3rd-9th weeks: 1 to 3 ml/L
- ATA Coco Max:
- 1st-5th weeks: A and B from 1 to 3 ml/L
- 6th-9th weeks: A and B 3 to 4 ml/L
- Bloombastic: 6th-9th weeks: 0.5 to 1 ml/L
- Silic Boost: 1st-9th weeks: 0.05 to 0.1 ml/L
B’Cuzz Coco A&B + Bloombastic

- Coco Nutrition:
- During weeks 1 and 2: A and B 0.5 to 1 ml/L
- During weeks 3 and 4: A and B from 1 to 2 ml/L
- As weeks 5 and 9 arrive: A and B 2 to 3 ml/L
- Atazyme: 3rd-9th weeks: 1 to 3 ml/L
- Root Stimulator: 1st-2nd weeks: 0.5 to 1 ml/L
- Coco Booster: 3rd-5th weeks: 0.1 to 0.5 ml/L
- Coco Bloom Stimulator: 4th-9th weeks: 0.5 to 1 ml/L
- Bloombastic: 6th-9th weeks: 0.5 to 1 ml/L
- Silic Boost: 1st-9th weeks: 0,1 ml/L
B’CuzZ Hydro A&B + Rootbastic + Bloombastic

- Hydro Nutrition:
In the 1st-2nd weeks: A and B from 0.5 to 1 ml.
As the 3rd-4th weeks progress: A and B from 1 to 2 ml.
During the 5th-9th weeks: A and B from 2 to 3 ml. - Root Stimulator: 1st-2nd weeks: 0.5 to 1 ml.
- Hydro Booster: 3rd-5th weeks: 0.1 to 0.5 ml.
- Bloombastic: 6th-9th weeks: 0.5 to 1 ml.
- Rokzbastic: last weeks: 0,5 ml/L
- Bloom Stimulator: 4th-9th weeks: 0.5 to 1 ml.
- Silic Boost: 1st-9th weeks: 0.1 ml.
- Atazyme: 3rd-9th weeks: 1 to 3 ml.
B’cuzZ Hydro A&B + Bloombastic

- Hydro Nutrition:
- In the 1st-2nd weeks: A and B from 0.5 to 1 ml.
- As the 3rd-4th weeks progress: A and B from 1 to 2 ml.
- During the 5th-9th weeks: A and B from 2 to 3 ml.
- Root Stimulator: 1st-2nd weeks: 0.5 to 1 ml.
- Hydro Booster: 3rd-5th weeks: 0.1 to 0.5 ml.
- Bloom Stimulator: 4th-9th weeks: 0.5 to 1 ml.
- Bloombastic: 6th-9th weeks: 0.5 to 1 ml.
- Silic Boost: 1st-9th weeks: 0.1 ml.
- Atazyme: 3rd-9th weeks: 1 to 3 ml.
B’cuzZ Hydro A&B + Blossom Builder Liquid

- Hydro Nutrition:
- 1st and 2nd weeks: A and B 0.5 to 1.5 ml.
- 3rd and 4th week: A and B from 1 to 2 ml.
- 4th-9th week: A and B from 2 to 3 ml.
- Root Stimulator: 1st-2nd weeks: 0.5 to 1 ml.
- Hydro Booster: 3rd-5th weeks: 0.1 to 0.5 ml.
- Bloom Stimulator: 4th-9th weeks: 0.5 to 1 ml.
- Blossom Builder Liquid: 6th-9th weeks: 0.25 to 0.5 ml.
- Silic Boost: 1st-9th weeks: 0.05 to 0.1 ml.
- Atazyme: 3rd-9th weeks: 1 to 3 ml.
Finally, from GB The Green Brand we hope that this guide has helped you to know how to use the Atami feeding charts.