Here are some basic steps to get an abundant, healthy, harvest, with some help from the sun and a few extra things. Growing weed outdoors can be a task; if you plant it with just soil, water  and sun, you’ll get something similar to cannabis but it won’t be the real deal. In order to get an acceptable final result, you’ll need to follow some specific steps.
There are a lot of methods when it comes to outdoor growing, but here we’ll focus more on seasonal growing; plant your crop during March-April and harvest your precious bud during September-October.
Seeds and Flowerpots
First of all, you need to pick what kind of marijuana seed you want, and begin germinating it. Afterwards, you need to find an adequate type of soil for your crop area, because plants that are in hot or cold areas do not need the same kind of soil. You will also need a few plant pots. Whether you plant in the ground or in pots, you’ll need to make sure your seeds have grown a little bit before transplanting them to their home, just to make sure you give them the best chance at surviving a hostile environment, in which bugs may try and attack your plants (and don’t think that because you live in a city that there will be no bugs).
You’re going to need two types of pots; one in which you should germinate your seeds, and another in which they begin the growing process. To germinate your seeds, the best option is a pot sized 7x7x9, because you will need to wet the seeds and this size can help avoid soaking them. To germinate your seeds you can use the Tupperware system, and once you can see the root popping out, you can transplant the seed to a small pot, making sure to bury the seed very close to the surface, around 1cm. Then, you should move the pot near a window or somewhere similar where there is lots of sunlight but not much wind.
The first days of life
After about 10 days, the plant should have grown so much that it’s almost doubling over. This is when you should transplant the plant to a bigger pot, about 3,5L. In this new pot, bury the trunk of the plant about two thirds, 6 to 10cm, so that extra roots are released into the soil and the plant is much more stable, increaing production. Then, water around the edges until the water begins to be absorbed by the plant. Be careful, because if you water the trunk directly, the plant may begin to rot.
When growing weed outdoors you’ll need to keep our plant somewhere where it can get direct sunlight, and if possible, out of the way of the wind or the cold. Also, if it gets extremely cold or windy, you can consider bringing the plant inside. Once the plant is about a palm off the ground, after about a month, you can bring them outside without worrying about the trunk breaking, or a bird coming and flying off with it. Although your plant will do well against those types of attacks, you still need to protect it from another type: insects.
Growing Weed Outdoors | Preventive Products
There are three absolutely necessary products (apart from fertilizers) that you’ll need to protect our outdoor plants – Neem, Propolix, Bacilus Thuringiensis.
- Neem – This is used to repel insects like white flies or plant louse. You should use it as soon as spring starts, which means that the first spray you give your plants should be from this all natural product. Neem oil comes from a venomous plant, so when insects smell the Neem plant, they will obviously stay away or simply attack a different plant, which is optimal as long as it’s not yours. Sometimes it can even be used as an insecticide when your plants have been infected, although chemical products tend to fair better.
- Propolix – This product protects your plants from fungus like mildew or botrytis, which are absolutely devastating to marihuana crops. You should start using propolix as soon as possible, which means the next time we spray your plants, it will be with propolix. You should repeat this process every 20 days up until 30 days before harvesting, and you should be free of any kinds of fungus. Bees are responsible for making propolix so that nothing can get into their hive.
- Bacillus Thuringiensis – This product will put an end to those eggs that butterflies like to leave on your crops, just as they’re beginning to flower. If you don’t act against these plant-squatters, they’ll eat your crops from the inside out. Sometimes it can be extremely difficult to detect them because they camouflage themselves really well in between the buds, but if you look closely you can see where they eat and also their feces. At the beginning of June you should begin spraying your plant, and then once every 20 days up until there are 30 days left until the harvest.

Feeding Charts and pH levels
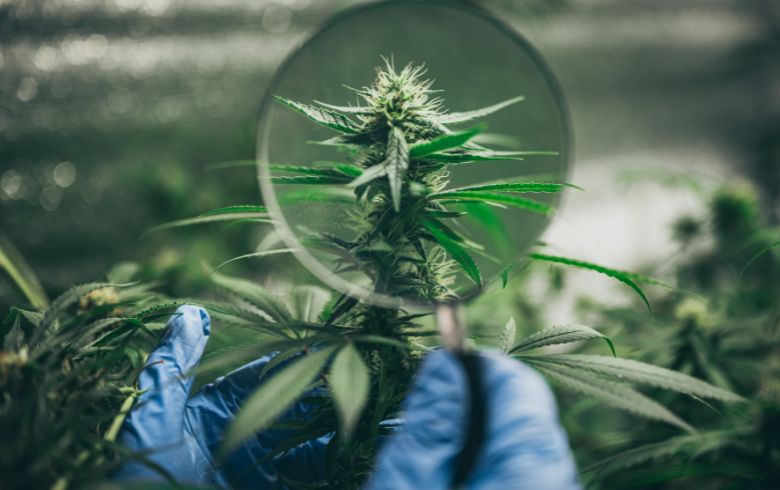
When spraying your plants you need to make sure that they’re big enough, because a plant with a very skinny trunk will end up doubling over under the weight of the liquid. We’ll need a strong plant, more or less like the one in the picture.
Every day you’ll be able to see how our plants grow. They don’t ask for much, just water and sun, but their lives are only just beginning. Little by little you should begin fertilizing your plant to ensure that they develop properly, and you should also control the pH levels in the water that you use. If you don’t check the pH levels you might not know why certain things are happening to your plants, like why they’re not absorbing what you give them, which is something that can happen with high or low pH levels.
During the growth phase, the pH levels must range between 5,5 and 5,8, including fertilizers. There are a wide variety of composts available for your plants. Both your plants and their flavor will be grateful to you for using organic composts. If you don’t mind sacrificing a bit of flavor, you can get more quantity and a nicer looking plant, but plants grown with organic compost will always taste better. During this phase, we’re going to need compost that is rich in nitrogen, the substance that your plant needs the most during this phase. You can give this to your plant in the form of worm humus, and you can add other bio composts like the Canna Bio Vega. If you stick with this and keep the pH under control, your plant will be perfect throughout its entire growth.
Growing Weed Outdoors | Necessary Transplants
Eventually, your plant will stop growing, you’ll go to check on it and it will be the same as the day before, and the next. The most likely explanation of this Is that your plant needs a transplant, so you’ll have to move it to a bigger pot, one more or less twice as big as the one it’s currently in. Then, you should continue tending to your plant until it stops growing again.
If you neglect to transplant your plants when they need it, they will surely stop growing. If you leave your plants in the same pot for too long, the leaves will start turning up with brown stains on them; eventually the leaves will fall off and you’ll end up with a weak plant without enough energy to flower. This means you’ll end up with an extremely low production rate and you won’t even be able to smoke it.
When summer is around the corner, around the 24th of June, the days will start getting shorter and in a few weeks your plants should start flowering. This means that as we come into July, you’ll want to move your plant to its permanent home. Marijuana plants need to be transplanted just before they begin to flower, because they shoot up and begin releasing flowers. This will obviously be the last transplant you do, due to the fact that you should never move your plants when they’re flowering, nor should you cut anything off of the plant during this phase. You could transplant your crop to the ground, even before the plants begin flowering, but it’s most definitely better to use plant pots, because:
- Nobody has seen your plant until now, you’ve been able to grow it far away from prying eyes
- It’s easier to keep critters and plagues under control, as well as excess water.
- They come out more compact and discreet if you grow them in pots; you’ll end up with a large quantity for the size of the plant (about 1.5m)
If you do decide to plant them in the ground and you want bigger plants, you can check out the article we wrote on planting marijuana in general, which, combined with this one, is perfect for what you’re looking for.
Growing Weed Outdoors | Flowering Phase
Once you’ve done the last transplant, you can enrich your soil with guano in a big pot or in the ground. You should fill your pot or a hole in the ground with a decent sublayer that adapts nicely to the soil. Then mix it with guano, about a spoon full per 7L of soil. For a bag of 50L, 7 or 8 spoonfuls should be enough. Bat guano is a slow absorbing nutrient, with high levels of phosphorus and potassium,. This is exactly what your plants are going to need in about a month.
Before you move your plant to the pot or to the ground, you’ll need to make a groove around the trunk so you can apply the dosage, and then cover up the groove. When you water the plant, the nutrients will slowly filter to the bottom and your plant will have more than enough for the flowering phase with the help of Bio Flowers or a complete flowering compost.
With that said, we’re practically at the end of our outdoor harvest; your product should be amazing quality for the amount of work it required. About 15 days before harvesting your plant, you need to wash out the soil with a lot of water so that you get rid of the excess nutrients and the plant is as clean as possible for harvest.
Once you’ve washed it out, you need to make sure that the soil or earth is nice and dry, and then water your plant with just water until harvesting day. When growing weed outdoors, soil must be dry the day you harvest your plant to avoid ending up with a plant full of water, which could lead to a rotten plant. Many people make the mistake of harvesting their plants when they’re still to humid, which ends up in a ruined harvest.
Now, all you have to do is follow the steps in the article we wrote about drying and curing and you’ll have everything you need to enjoy your very own home-grown weed.
Author: Javier Chinesta
Translation: Ciara Murphy